
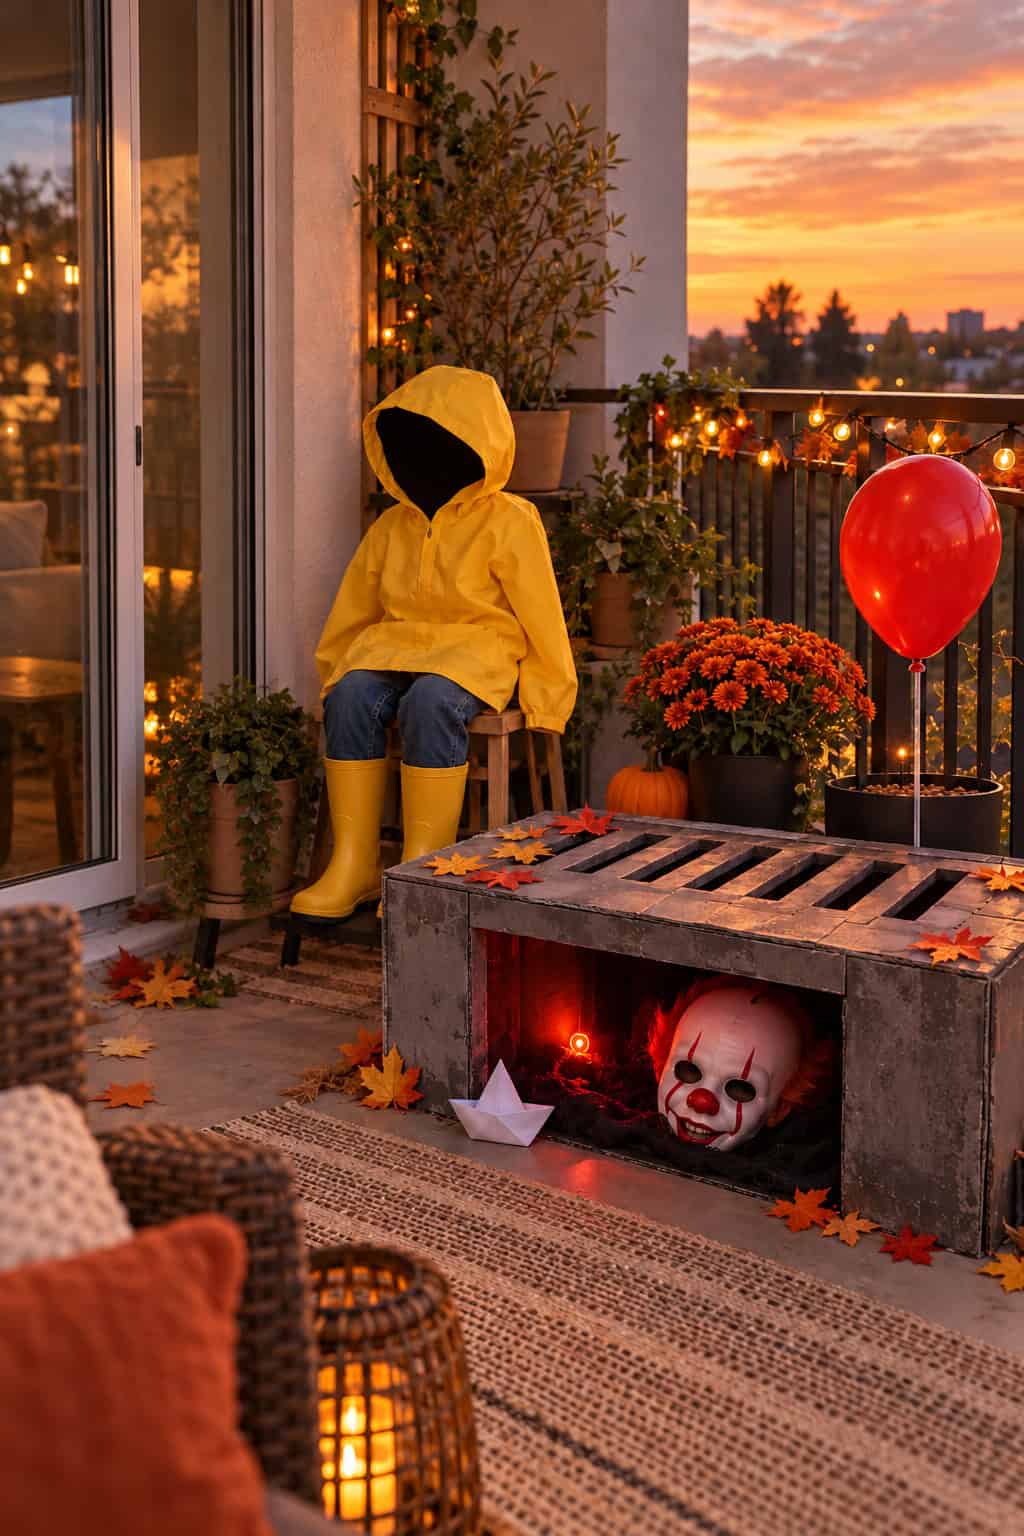
Turn your apartment balcony into a creepy Halloween scene with a mysterious storm drain, a floating red balloon, and an eerie yellow raincoat prop.
This budget-friendly DIY project uses a cardboard box, painted foam board, a creepy clown mask, and a few simple decorations to create a spooky sewer display. It’s beginner-friendly, easy to customize, and perfect for a covered balcony or other small outdoor space.
Disclaimer: This DIY decoration is inspired by Stephen King's IT horror novel and its film adaptations. It is an independent, fan-inspired project created for Halloween decorating purposes and is not affiliated with, endorsed by, or officially associated with Stephen King or the creators and rights holders of IT.
Materials You’ll Need
- Large, sturdy cardboard box (approximately 30 inches wide)
- Foam board or thick cardboard
- Gray and black acrylic paint
- Black fabric
- Paintbrush and sponge
- Hot glue gun or strong craft adhesive
- Craft knife and scissors
- Small brick or paver for weight
- Creepy plastic clown mask
- Battery-powered red or amber LED light
- Yellow hooded raincoat
- Old jeans and rain boots
- Small, sturdy stool
- Old towels for stuffing
- Zip ties
- Red balloon and clear balloon stick
- Small flowerpot filled with sand or gravel
- White paper for a miniature boat
- Artificial autumn leaves
Step 1: Build the Fake Storm Drain
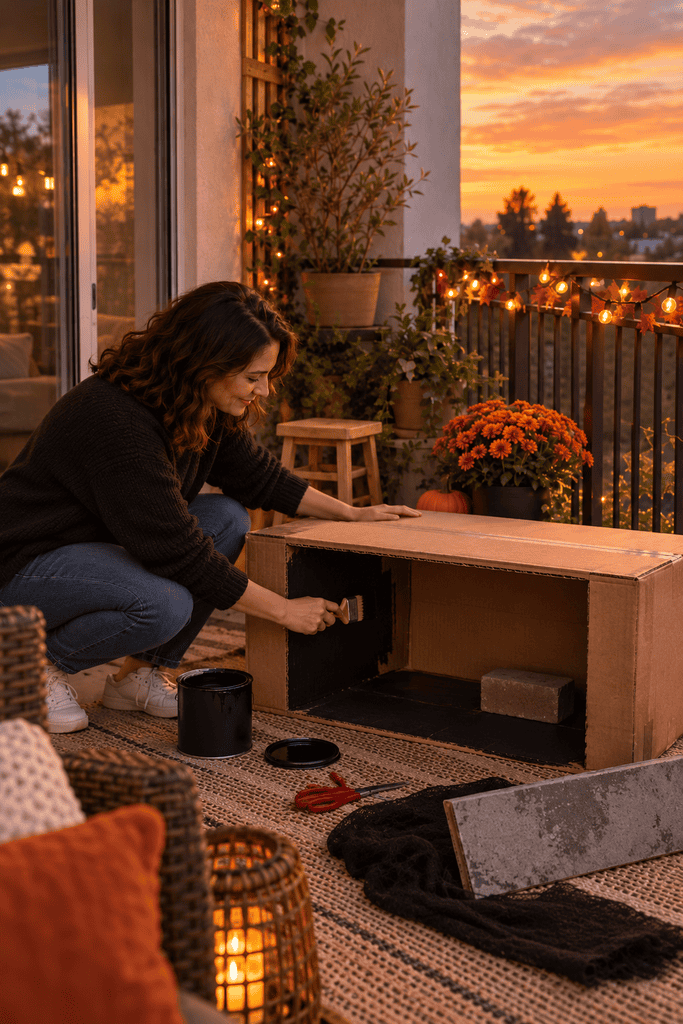
Start with a sturdy cardboard box approximately 30 inches wide and 12–18 inches tall.
Lay the box on its side with the opening facing forward. This will become the entrance to your fake sewer.
Paint the interior matte black or line it with black fabric to make the opening appear deeper and darker.
Place a small brick or paver inside the back of the box to help keep it stable.
Step 2: Create a Weathered Concrete Entrance
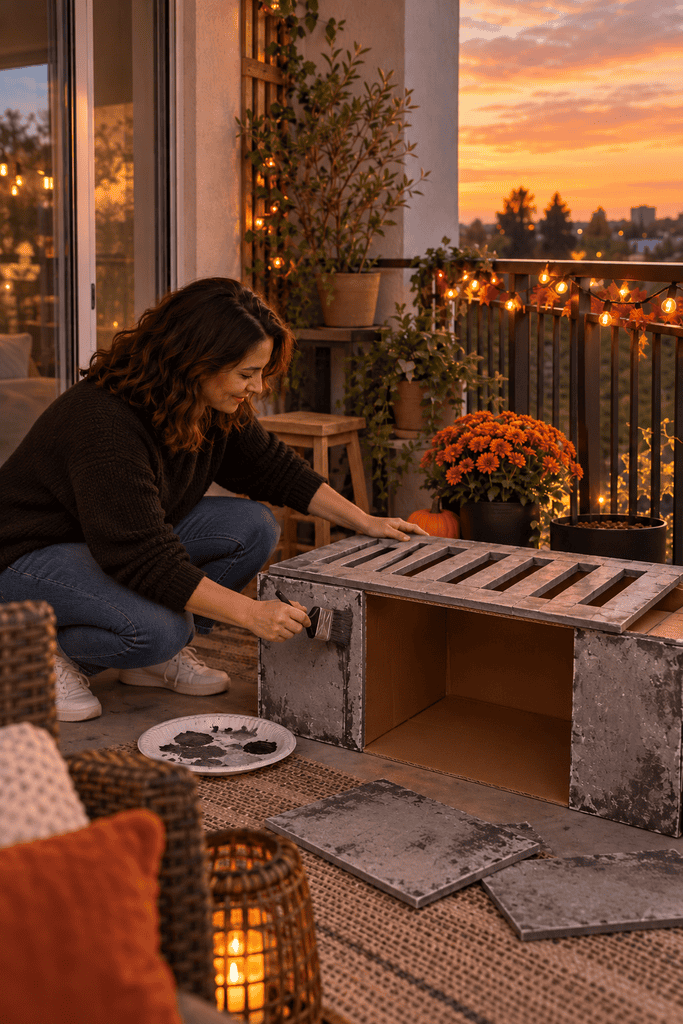
Cut foam board into flat rectangular panels to resemble old concrete slabs.
Paint each piece gray, then dab darker gray and black paint onto the surface with a sponge to create a weathered appearance.
Glue the panels around the front and top of the cardboard box, leaving the main opening exposed.
For a storm-drain effect, you can also cut a few narrow rectangular slots into a separate foam-board panel and attach it across the top.
Tip: Lightweight foam board is ideal for balconies because it's easier to move and store than real concrete blocks.
Step 3: Add a Creepy Clown Mask Inside the Drain
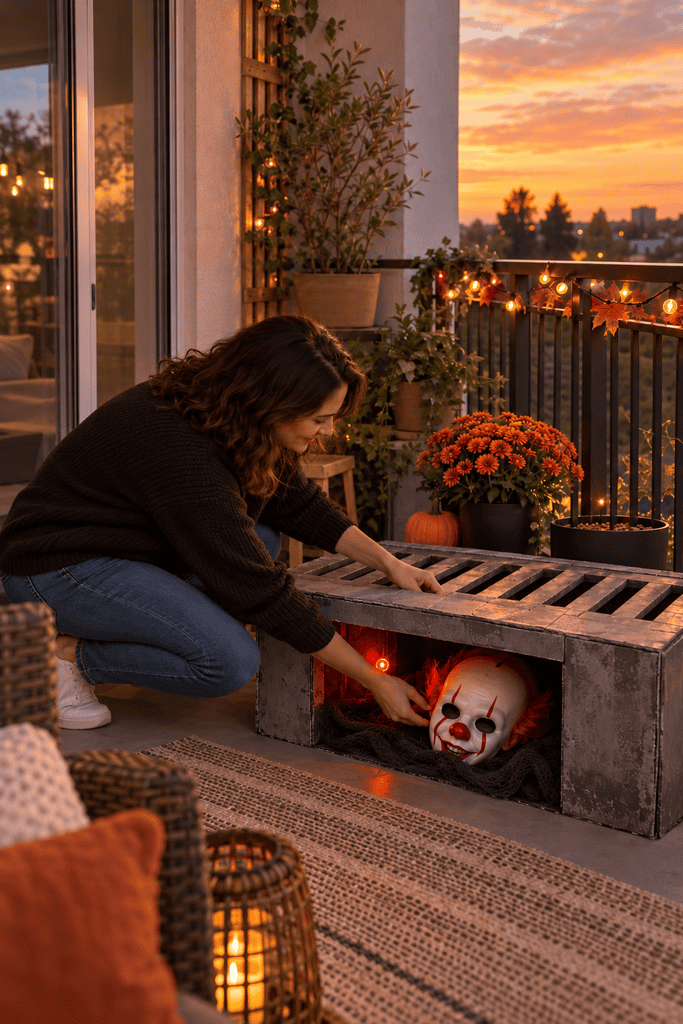
Place a generic plastic clown mask toward the back of the dark opening.

Choose a mask with exaggerated features, dark eye openings, or a crooked grin. A simple plastic Halloween mask works well and avoids the need for an expensive realistic prop.
Use crumpled black fabric to support the mask and partially conceal its edges.

Position a small battery-powered red or amber LED light nearby to create a faint, eerie glow.
Keep the mask mostly hidden so it appears to be lurking inside the storm drain.
Step 4: Make the Yellow Raincoat Prop
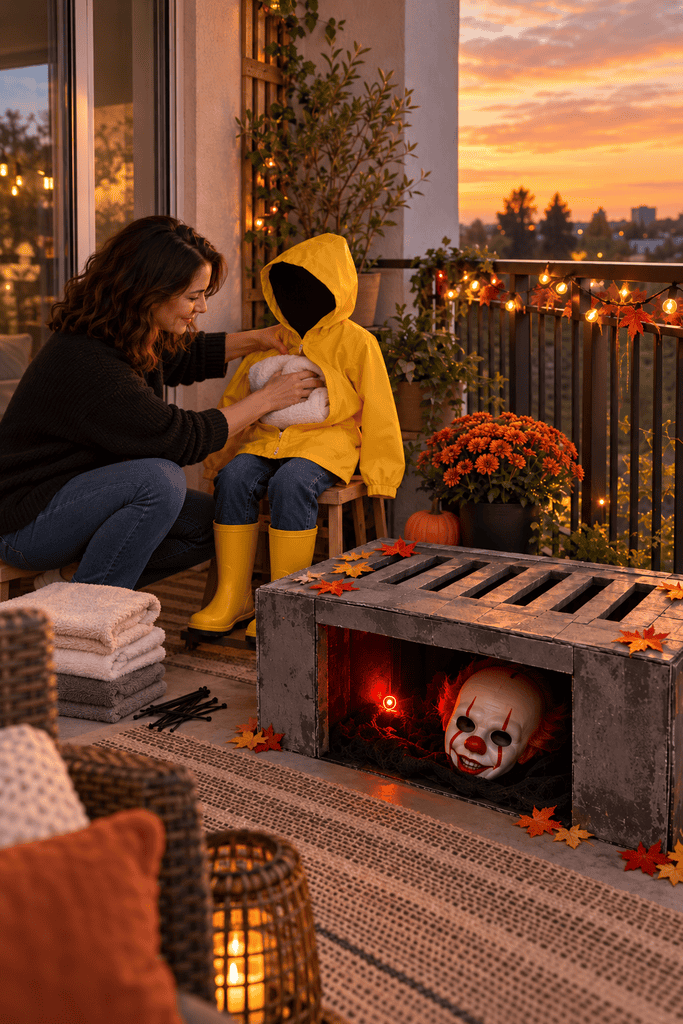
Place a small, sturdy stool beside the storm drain.
Drape a yellow hooded raincoat over the stool, then stuff the body and sleeves with old towels to give the clothing shape.
Arrange jeans and rain boots underneath to complete the decorative display.
Pull the hood forward and position black fabric inside the opening so it appears completely dark and empty.
Secure the clothing and stuffing to the stool with zip ties to keep everything in place.
Angle the finished raincoat prop slightly toward the storm drain for a mysterious effect.
Step 5: Add the Red Balloon and Paper Boat
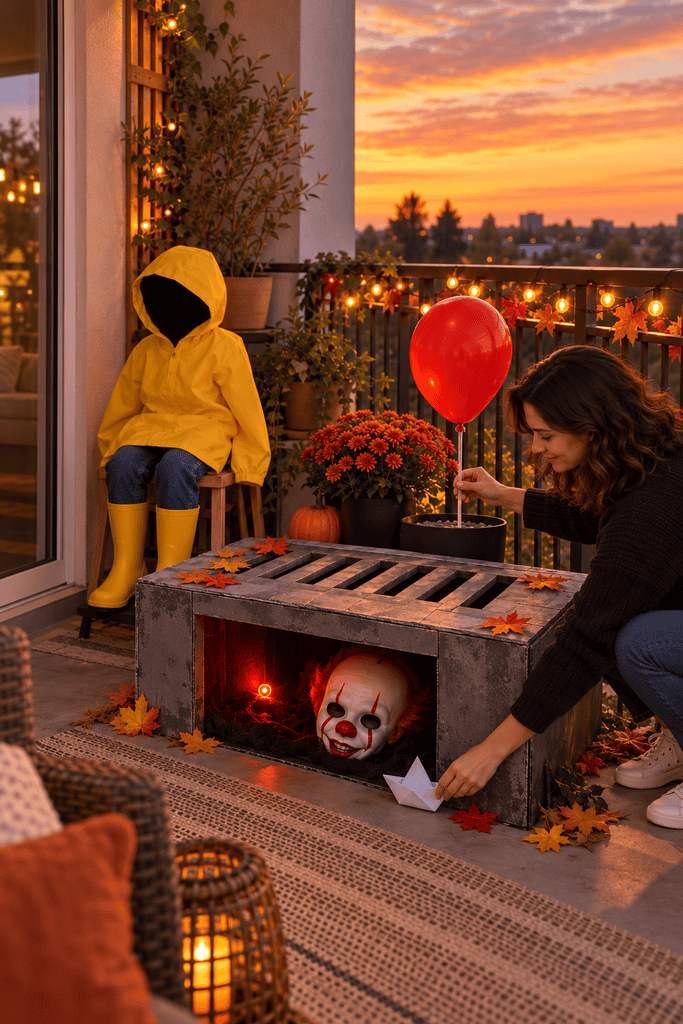
Inflate one bright red balloon with air and attach it to a clear balloon stick.
Insert the stick into a small flowerpot filled with sand or gravel. Position it beside the storm drain, keeping the support as discreet as possible.
Next, fold a small white paper boat and place it near the drain entrance.
If your balcony is exposed to moisture, use waterproof paper or apply a clear sealant to help the boat maintain its shape. Secure it with a small piece of adhesive so it doesn’t blow away.
These two recognizable details complete the IT-inspired Halloween atmosphere.
Step 6: Display Your Decoration
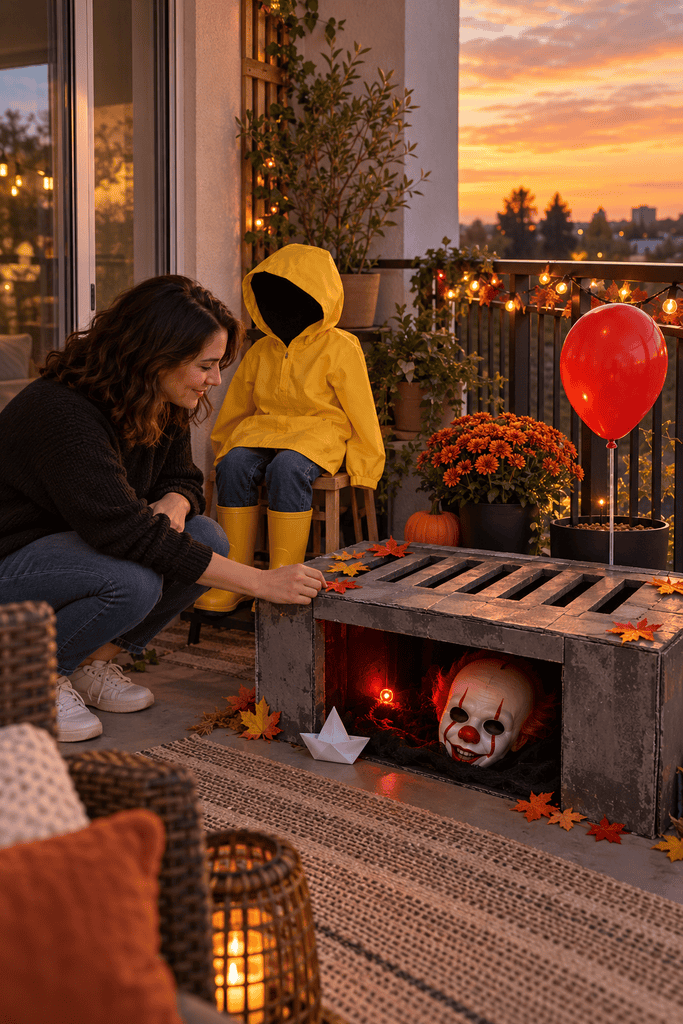
Arrange the finished storm drain in a sheltered corner of your apartment balcony.
Position the yellow raincoat prop beside the opening, with the red balloon nearby and the paper boat in front.
Keep the colored LED light inside the drain dim enough that the clown mask remains partially hidden.
Scatter a few artificial autumn leaves around the base to give the scene a weathered, abandoned appearance.
Make sure the display is stable and doesn’t block the balcony door, walking space, or drainage outlets. Avoid attaching decorations to shared walls or railings without permission.
Use outdoor-rated battery lights, and bring cardboard decorations indoors during heavy rain or strong winds.
Make Your Balcony Look Like a Rainy Horror-Movie Scene
For an extra creepy touch, place a small piece of glossy black vinyl or plastic on the balcony floor directly in front of the storm drain.
The shiny surface will reflect the red LED glow and create the illusion of wet pavement without using actual water.
Keep the material flat, secure its edges, and position it away from walkways to avoid slipping or tripping hazards.
This simple detail makes your IT-inspired Halloween balcony decor feel more atmospheric without adding complicated materials or expensive decorations.